Introduction
Welcome to Tech Naandi Solutions. Do you Want to Record Windows 10 screen? Here’s how you can Record Screen Using Powerpoint on Windows 10 Laptop/Desktop. In this article, we will learn about How to screen record on Microsoft PowerPoint in windows 10 PC with simple and easy steps.
If you have been using Microsoft Office, then you might be rightly knowledgeable of Microsoft Powerpoint. It’s a presentation program that allows you to create slide presentations. There are numerous points that you can do with this application.
If your searching for a way to record your computer screen without installing any extra application, then you can use Microsoft Powerpoint. Microsoft Powerpoint makes it really easy to record your screen in both pictures and video variants.
Steps To Record Screen on Microsoft PowerPoint
Therefore, during this article, we’ve selected to share the most effective method to record Windows 10 screen using Microsoft Powerpoint. This recording characteristic is already within the latest version of Microsoft Powerpoint. So, let’s try a way to record your screen with Microsoft Powerpoint.
1: First of all, open the start menu on your laptop and search for Powerpoint.
2: Open Powerpoint and click on a Blank Presentation which will create a new presentation.

3: On the following step, you need to select the slide from the left pane.
4: Once selected, now click on the Insert tab.
5: Now you need to search for the Recording button as shown in the screen below.

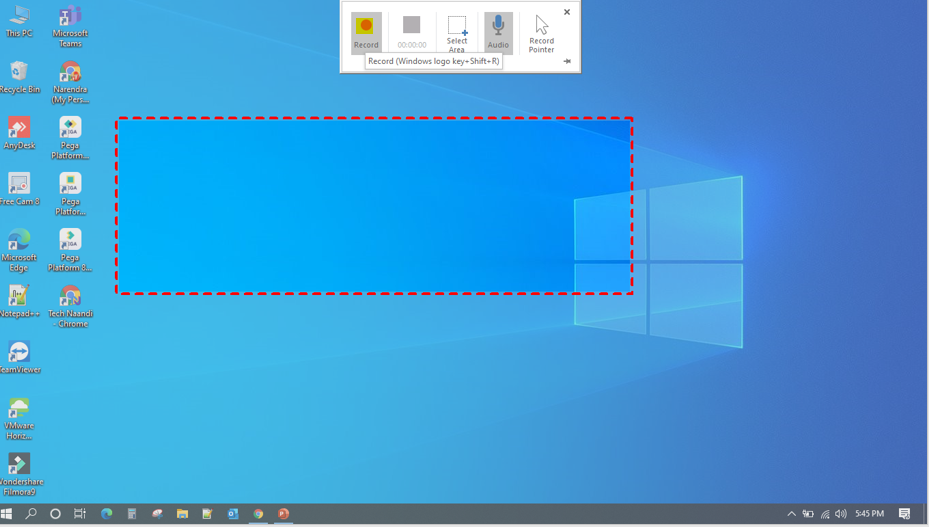
6:Once done, you may see a panel like this. Click on the Select area to record a particular area.
7: To start your recording, just click on the Record button.

8: Once your recording has completed, simply click on the Stop button. To save the record file into your desktop/laptop, simply right-click on the recording and choose the Save Media As button.
9: On the subsequent window that exposes, choose the name and file location, and click on on the Save button. That’s it! you’re done. this is often how you’ll be able to record your screen on Windows10.😍
Conclusion
So, this text is all about how you’ll record your screen with Microsoft PowerPoint with simple steps. I hope this text helped you! Share with your friends also.
Thanks for your support we will provide more tricks & tips for you. If you like our tricks, share these with your friends and join my Telegram Channel , WhatsApp Channel And Youtube Channels for more new tricks & tips.


 PEGA Interview Questions
 Pega Real Time Scenarios

 Outlook
 Android Mobile
 Whatsapp Tricks
 Telegram Tricks
 Facebook Tricks
 SMS Tricks
 Online Money Earnings
 UAN & PF Services
 Latest News / Updates
 SEO Tools

 Netflix
