
 Items Below Rs.100
 Mobiles Accessories
 Cables & Chargers
 Juicers & Mixters
 Storages And Containers
 Home Must Have Items
 Home Decoration
 Power Accessories
 Men’s T-shirts
 Men’s Shoes
 Sarees
 Bike Accessories
 Car Accessories
 Cycles And Accessories
 Bluetooth Speakers
 Home Theatres


 Gmail Tricks
 Whatsapp Tricks
 Facebook Tricks
 YouTube Tricks


How to Add an Email Signature in Outlook
Adding a signature to your emails says to others how professional you are. Setting an email signature to your outlook will also save time for you so that you no need to type your signature details every time when you are sending a new email from outlook. Fortunately, learning how to add an email signature in Outlook is a pretty straight forward process.
How to Add Email Signature in Outlook for Windows
Creating a signature in Outlook is easy for all versions of Outlooks such as outlook 2019,2016, and 2010,. with simple steps given below, let’s get started into our process
Click on File in Menu –>Got to Options –> select Mail –> go to Signatures.
For Outlook 2007
Select Tools –>Go to Options –> Select Mail Format –> Signatures.
Setting up a signature is different steps for setting it up on the Outlook web app and on Outlook for Mac.
How to create a signature in Outlook 2010,2016, and 2019
- Open the Outlook app.
- Open File from Outlook menu bar as shown in the screen below.
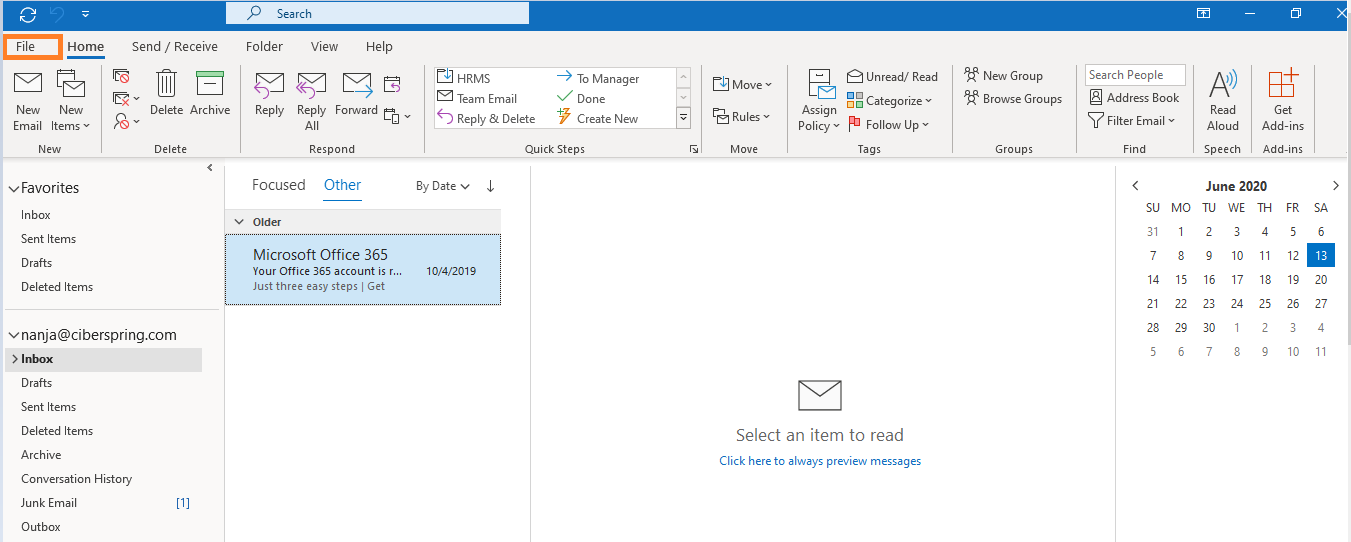
3. Then click Options.

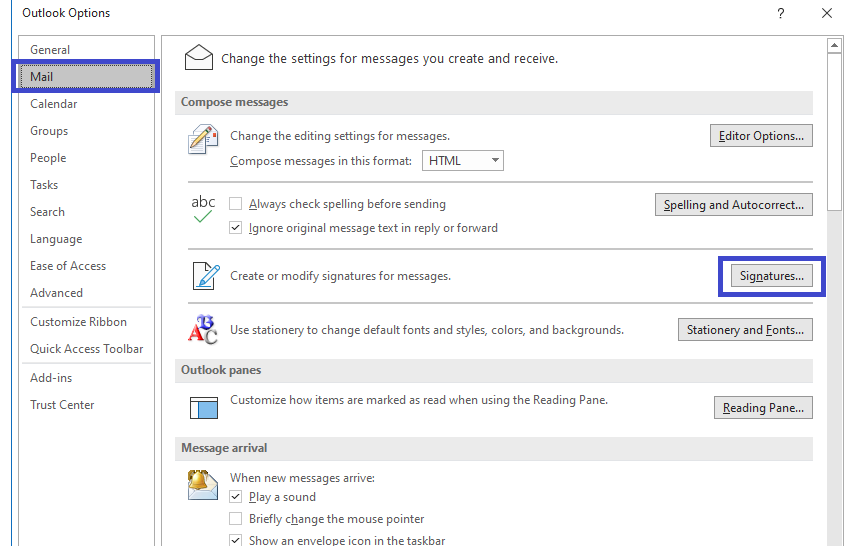
4. Click on Mail in the Outlook Options dialog box.
5. Then click on Signatures. It will open a new window where you can create your own signatures.
Note: Remember that in Mobile the signatures will use text-only and we do not have the option to format text or insert hyperlinks and Images.
6. In the Email Signature tab, click on New.
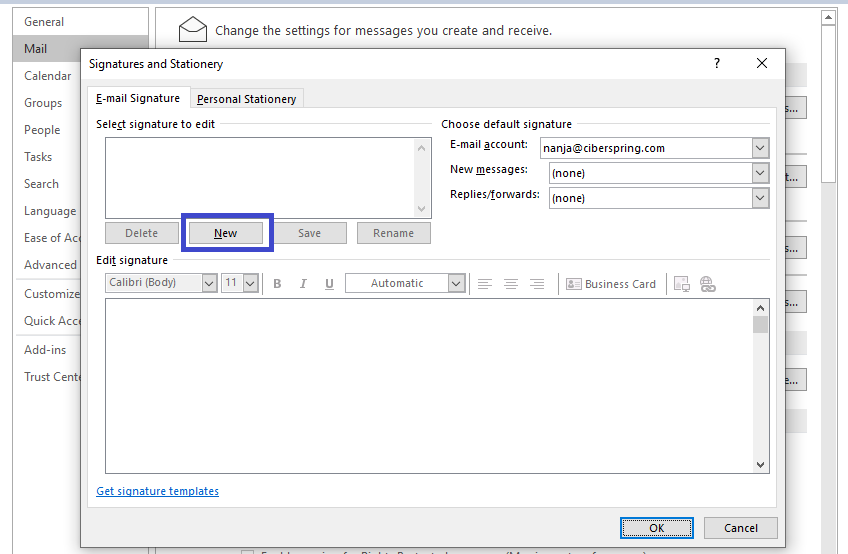
7. Type in a name for your signature in the pop-up box, and click OK.
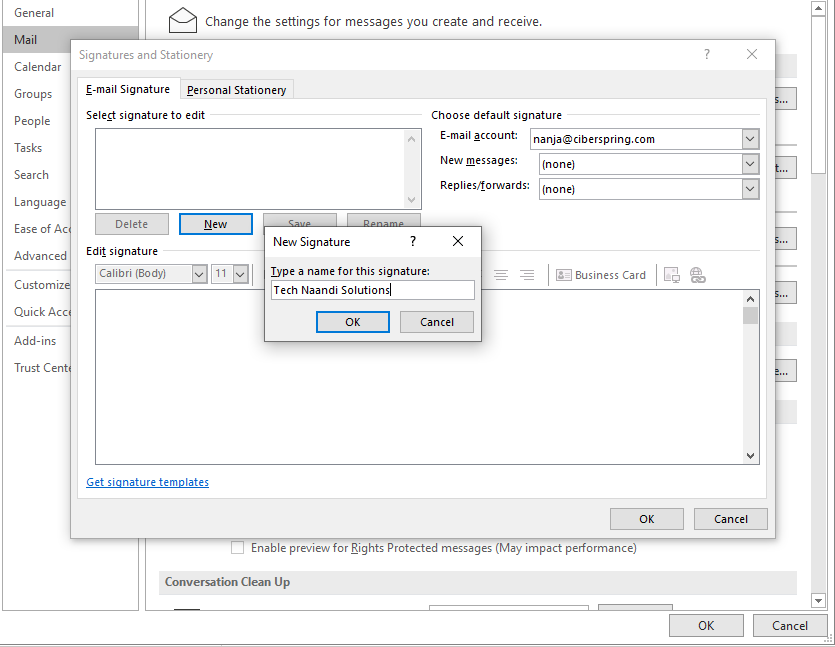
8. Type your signature in the Edit Signature box. Here is the place where you can enter your name, your Job title, Your company name, Your contact number, and your email address, or anything that you want to add to your signature.
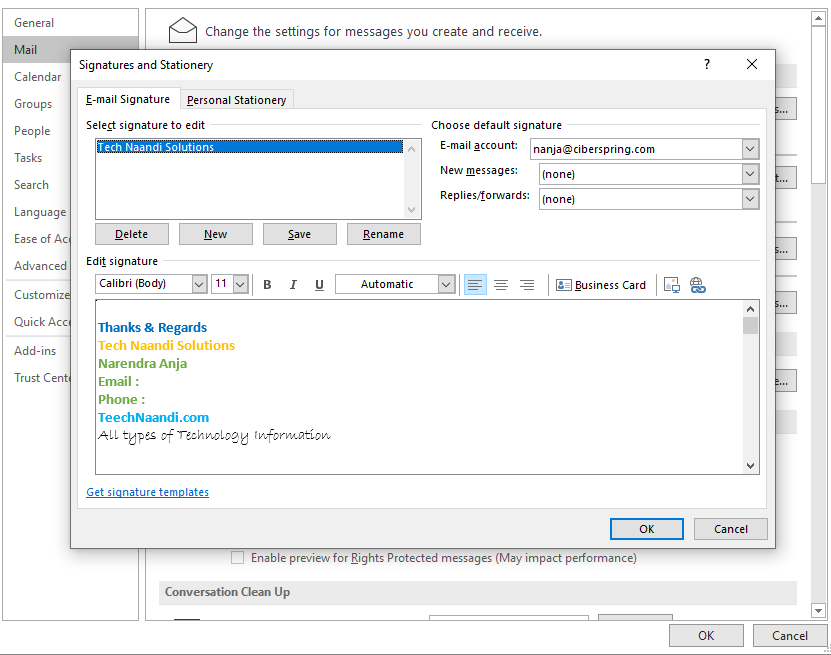
Then you can use different editing options in the Edit Signature box to format your signature.
- You can change font type, text size, text effects, text color, and text alignment as you want.
- You can insert your company logo, social media buttons, or any other images by selecting the image icon options. This will take you to your computer drives to import any photo from your computer or hard drive.
- You can also insert any link by selecting the Hyperlink icon (You can observe from the above image that it looks like a globe with a chain at last)
- You can also insert a business card that you have set up in Outlook contacts by clicking on the Business Card icon ( You can observe that option in the above image ).
- While sending New Messages, you can choose which email signature to attach to all new messages that you will send. Here the Outlook will automatically add the selected signature to mails every time you try to send a new message.
- you can also choose which email signature to attach for the Replies /Forward dropdown.
9. Click on OK when you’re designed your signature as you need with different styles.
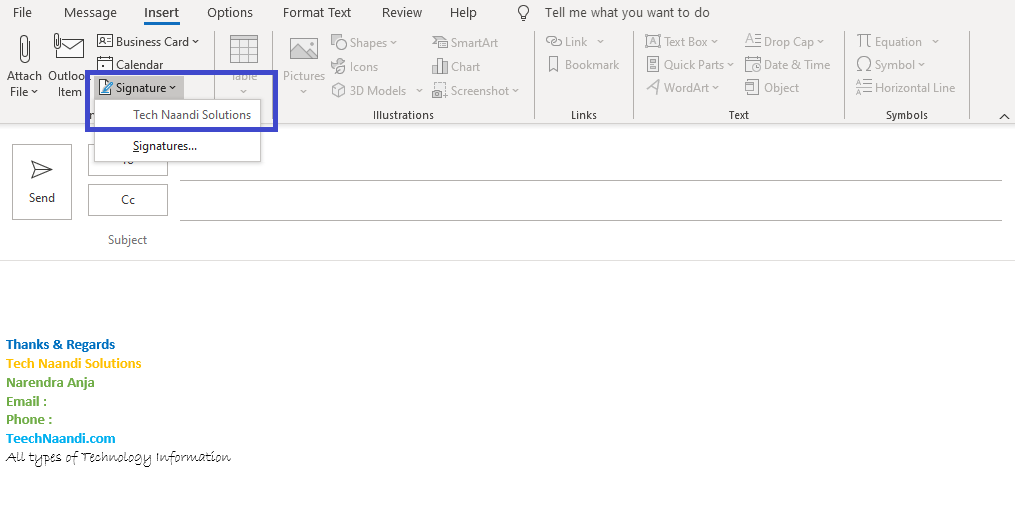
After adding you can then see all your signatures by opening a new email. If you want to insert it manually to your new mail, go to insert option –> select Signature and choose which signature you would like to add as shown in the image below.
How to Create Email Signature in Outlook on the Web
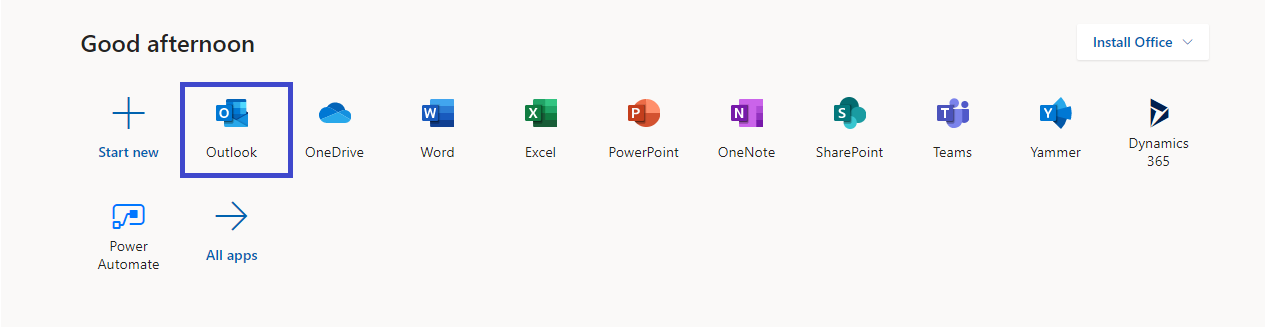
- First, Sign in to the official website office .com. You might be asked to sign in. Use your Microsoft username and password.
- Then open the Outlook tab.
3. Click on the gear icon in the top-right corner of the window.
4. Then click on View All Outlook Settings. You can see this option in the bottom-right corner of your window as shown in the image below.
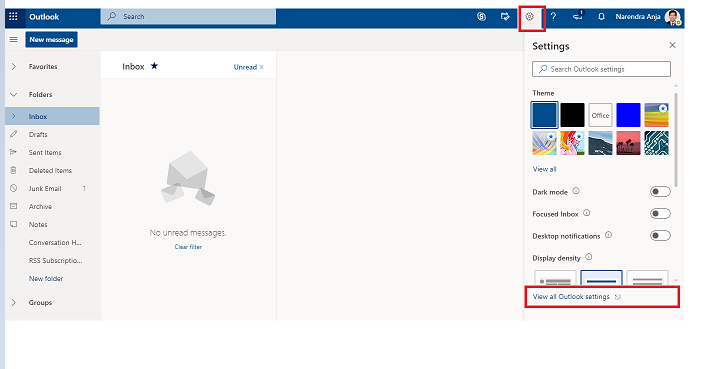
5. Select Compose and Reply. You will find this is in the left-side column.
Note: Remember that in Mobile the signatures will use text-only and we do not have the option to format text or insert hyperlinks and Images.
6. Then type in your signature in the compose and Reply window.

7. Once Done Click on Save.
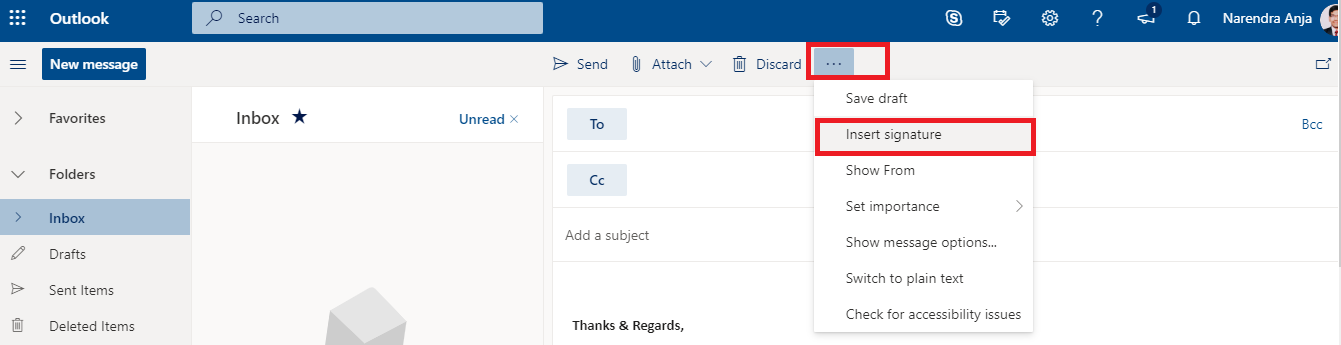
To see your saved signatures, click on New Message. By default, the Outlook will automatically add your new signature at the bottom of the message. If you want to add your signature manually to new messages, click n the 3 dots icon at the top menu for composing a message, then click on insert Signature as shown in the screen below.
How to Add an Email Signature in Outlook for Mac OS
- Open Outlook
- Go to the Preferences Menu. You can find this by clicking File > Preferences, or by hitting the Command + Comma keys.
- Click on Signatures.
- To add a new signature click on the + sign near the Edit Signature window.
- Edit the signature name. The signature will be named Untitled by default. Now Click on the Untitled signature name option and rename it to your own signature styles.
- Type your new signature details as you want in the Signature box.
- Customize your new Signature settings in the Choose default signature section. You can choose to associate a signature with a certain email account, or have the signature appear in new messages or emails you reply to or forward to others.
- Click the X Button.
- Compose a New email.
- For every new mail, you can see your new signature will appear at the bottom. If not you can manually add your Signature, by clicking on Signatures at the Message tab in the New Email window, then select the signature you want to add for your new Mail.
Thanks for your support, we will provide more tricks & tips for you, if you like our tricks please share with your friends and join into my Telegram Channel for more interesting tricks & tips.